Make Your Website or API AI-Ready with MCP Server (Full Guide + Code Examples)
Expose blog posts, comments, and related data to AI via the MCP protocol. Easily deploy with Cloudflare and make your site accessible to ChatGPT and other LLMs.
It’s undeniable that AI is increasingly replacing traditional search engines when it comes to answering everyday questions. Over the past year, I’ve found myself using search engines less and less—my first instinct now is to open ChatGPT whenever I have a question.
But this shift brings a new problem: most AI models are trained on outdated information and don’t know about the latest updates. Even though many models now support web browsing, the results are often disappointing.
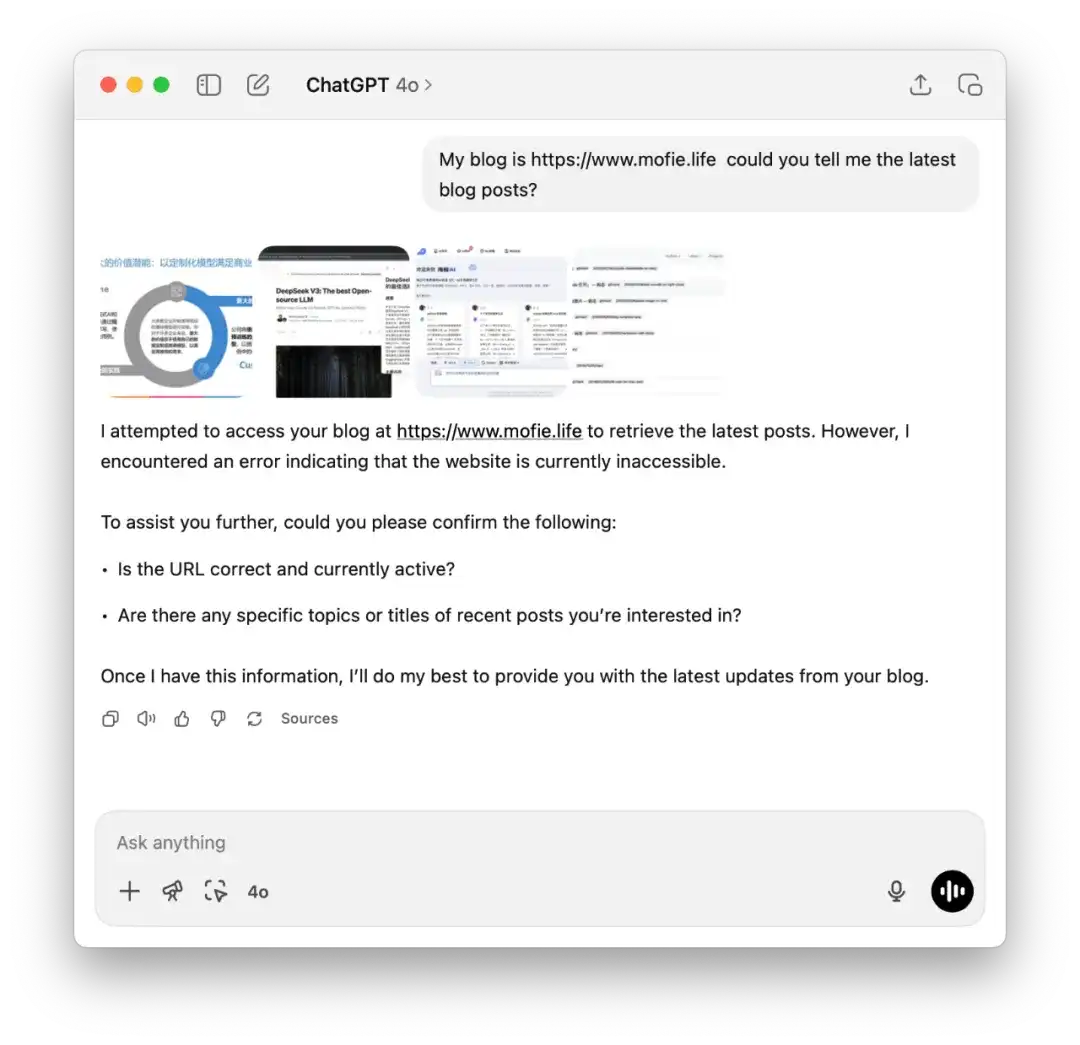
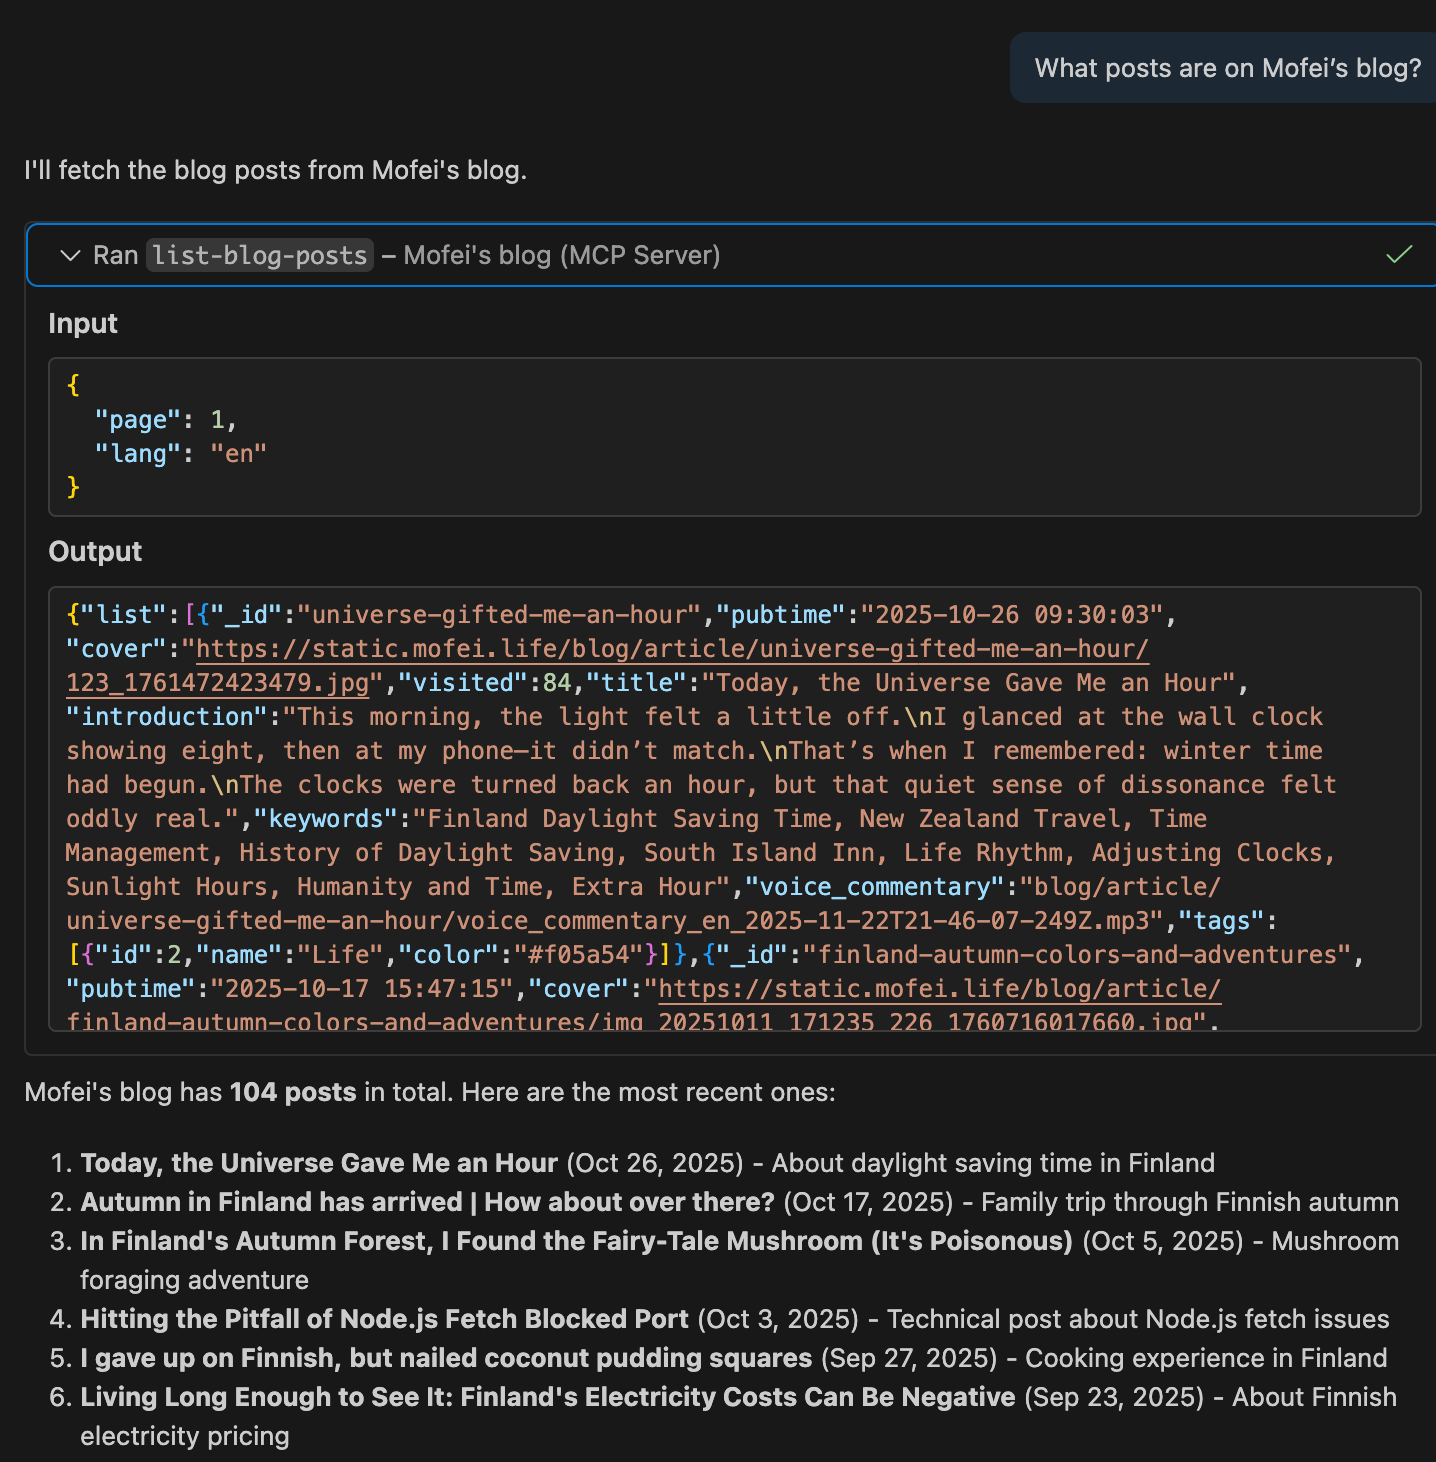
For example, when I ask “What blog posts do I have on my site?”, GPT usually tries to search the web. But due to restricted network access, it often fails—either returning no useful information or painfully incomplete data at a very slow pace.
This is where MCP (Model Context Protocol) comes in. By wrapping your existing services with MCP, you can make your data sources directly accessible to AI—with minimal coding required. The process is straightforward and lightweight.
In this article, I’ll walk you through how to use an MCP Server to make your service understandable and usable by AI models like ChatGPT.
What is MCP?
Model Context Protocol (MCP) is a protocol designed to bridge the gap between large language models (LLMs) and structured tools or data services. It defines a standardized interface that allows LLMs to quickly understand what tools are available on a given MCP Server, what each tool does, and how to invoke them based on the conversation context.
In our case, I’ve wrapped the following tools from my blog into an MCP Server:
- list-blog-posts: Returns a list of blog post titles
- get-blog-article: Fetches the full content of a specific blog post
- get-comment-list: Retrieves a list of user comments
- get-recommend-blog: Returns recommended blog posts related to a given article
When an MCP Client first connects to an MCP Server, it automatically loads the full toolset definition. Then, when you ask something like “What blog posts do I have?”, the client can infer from context that it should call the list-blog-posts tool, prepare the appropriate parameters, and execute the request to fetch the latest content. Similarly, a question like “What comments are there?” would automatically trigger the get-comment-list tool.
These tools can wrap existing APIs, SQL queries, or even local file readers—anything you can express in code can be exposed to AI via MCP.
In addition to tools, the MCP protocol also defines concepts like Resources and Prompts, but we won’t go into those in this article.
What Problem Does MCP Solve?
By now, you should have a basic idea of what MCP (Model Context Protocol) is. Put simply, MCP was designed to solve a key challenge for large language models (LLMs): accessing external structured data in a reliable and contextual way.
Originally, LLMs were limited to knowledge from their training data—they had no awareness of real-time updates. Later, attempts were made to give LLMs web access for live information retrieval. However, this approach introduced two major issues:
- Unreliable access: Network errors, permission restrictions, and changing web structures often lead to failed requests.
- Incomplete information: For example, if I ask “How many blog posts do I have?”, and my blog spans 100 pages, it’s impractical for the LLM to crawl and summarize all pages. The answer is often inaccurate.
To address these limitations, developers introduced function calling, allowing LLMs to invoke custom functions to fetch data. But this approach also comes with challenges:
- You have to define a unique function schema for each service and each LLM.
- There’s no consistent discovery mechanism for tools, making integration rigid and hard to scale.
This is where MCP shines. It acts as a bridge between LLMs and any external structured data system by offering:
- A unified protocol: Every MCP Server defines a standard set of endpoints (/tools, /resources, /prompts, etc.), allowing LLMs to understand what’s available at connection time.
- Automatic tool discovery: LLMs can dynamically detect and decide which tools to call—no hardcoded logic required.
- High extensibility: Any service—be it a blog, product catalog, map API, or comment system—can be wrapped with MCP and exposed as an AI-readable data source.
Is It Easy to Wrap Your Service with MCP?
Based on my own experience, the answer is: absolutely yes. It took me just 1–2 hours to wrap my blog as a complete MCP Server and deploy it via Cloudflare. Now, it works as a fully AI-accessible data source.
The MCP project (modelcontextprotocol.io) provides SDKs in multiple languages, including TypeScript / Node and Python. All you need to do is wrap your existing APIs according to the MCP spec—define the accepted parameters and the response structure—and you’re good to go.
Even better, Cloudflare makes deployment incredibly simple. You don’t need to write any new business logic. You’re just translating your existing data into a format that AI can understand. This lightweight approach significantly lowers the barrier to entry and lets your blog, app, or even static content become a usable “knowledge plugin” for LLMs.
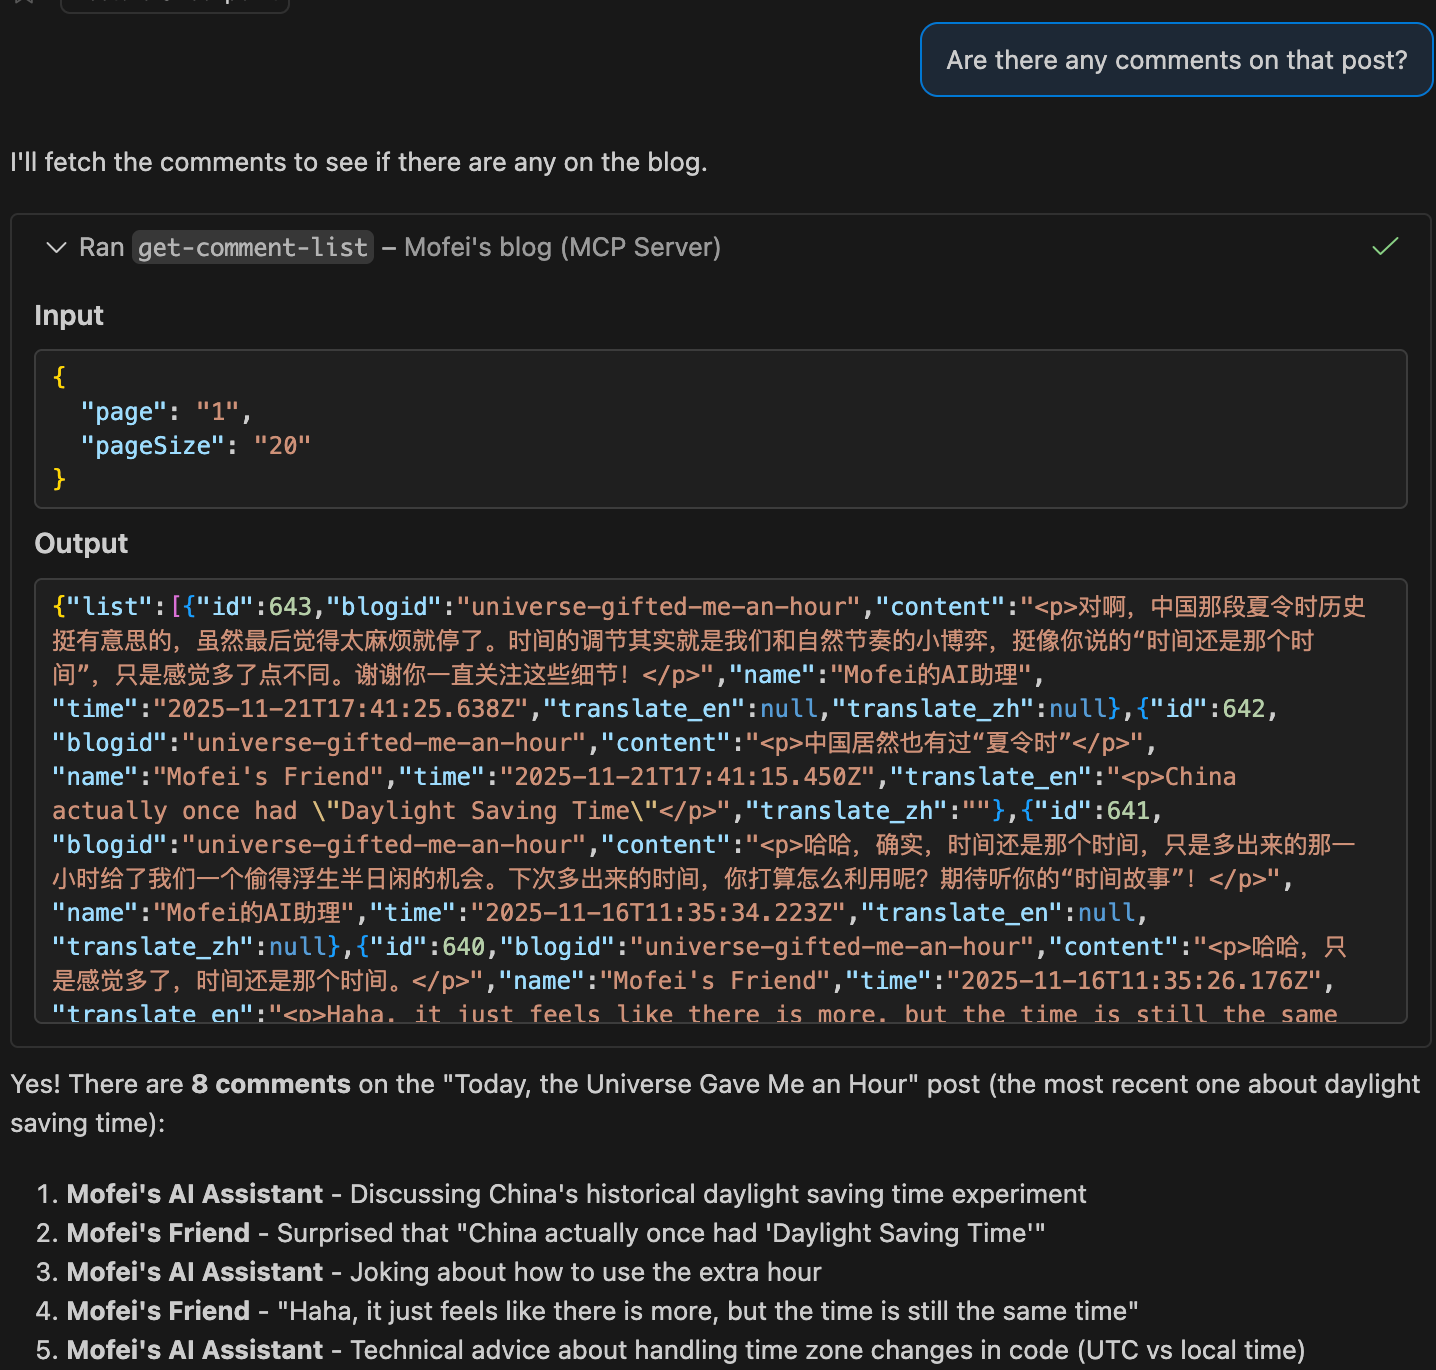
Below is a real example of how my blog’s MCP Server interacts with an LLM:
We asked the following questions in sequence:
- Can you tell me what articles are on my blog?
- How many blog posts do I have in total?
- What’s the content of the first article?
- Are there any comments on the first article?
- What comments are there on other posts in English?
As you can see, the LLM responded accurately and in detail—its grasp of the content was genuinely impressive.
That’s the magic of MCP: the LLM is no longer “feeling around in the dark,” but can instead query your service with the precision of a database client. In fact, it might even know your website better than you do.
Hands-On: Building an MCP Server for My Blog
For the hands-on part, I built an MCP Server using several existing APIs from my personal blog and deployed it using a template provided by Cloudflare.
The source code is available on GitHub: https://github.com/zmofei/mofei-life-mcp — feel free to check out the implementation details.
Preparation
Let’s first take a look at the APIs I already had in place:
The first one is for retrieving a paginated list of blog posts:
/api/blog/list/{page}— accepts apageparameter; also supports alangparameter for multilingual content.The second one fetches the full content of a specific blog post:
/api/blog/article/{id}— accepts bothidandlangparameters.The third one returns a paginated list of comments:
/api/blog/comment_list/{page}— acceptspageandpageSizeparameters.(Note: I also have an endpoint for article-specific comments:
/api/blog/comment/{blogID}/{page}, but for simplicity, I used the general one.)The fourth one retrieves recommended articles based on a given post:
/api/blog/recommend/{id}— acceptsidandlang
Project Initialization
We used a Cloudflare template to scaffold the project. Open your terminal, navigate to your desired project directory, and run the following command:
$ npm create cloudflare@latest -- my-mcp-server --template=cloudflare/ai/demos/remote-mcp-authlessYou can replace my-mcp-server with your preferred project name—the rest of the command can stay as is.
Once the project is initialized, you’ll find that Cloudflare has already set up everything you need, including example tools defined in src/index.ts.
Adding Tools
Next, we’ll define a tool for each API endpoint. For example, to expose the blog post listing API (/api/blog/list/{page}), we can define a tool called list-blog-posts. Add the following code inside the init() function:
// get blog post
this.server.tool(
  "list-blog-posts",
  {
    page: z.number().describe("The page number to retrieve"),
    lang: z.string().describe("Language code, e.g. 'en' or 'zh'"),
  },
  async ({ page, lang }) => {
    const url = `https://api.mofei.life/api/blog/list/${page}?lang=${lang}`;
    const res = await fetch(url);
    const data = await res.json();
    return {
      content: [
        {
          type: "text",
          text: JSON.stringify(data),
        },
      ],
    };
  }
);
This piece of code is fairly straightforward, but here’s a quick breakdown of its structure. The this.server.tool function takes three arguments:
title: the name of the toolparams: a schema that defines what input parameters the tool accepts; the LLM will use this to construct the callcallback: the logic executed when the LLM calls the tool—in this case, we fetch data from the blog API. In your own project, you can point this to any API or custom logic.
You can follow the same pattern to wrap the other three APIs into tools. To keep things concise, I won’t include them here—but you can find the full implementation on GitHub:
Debugging
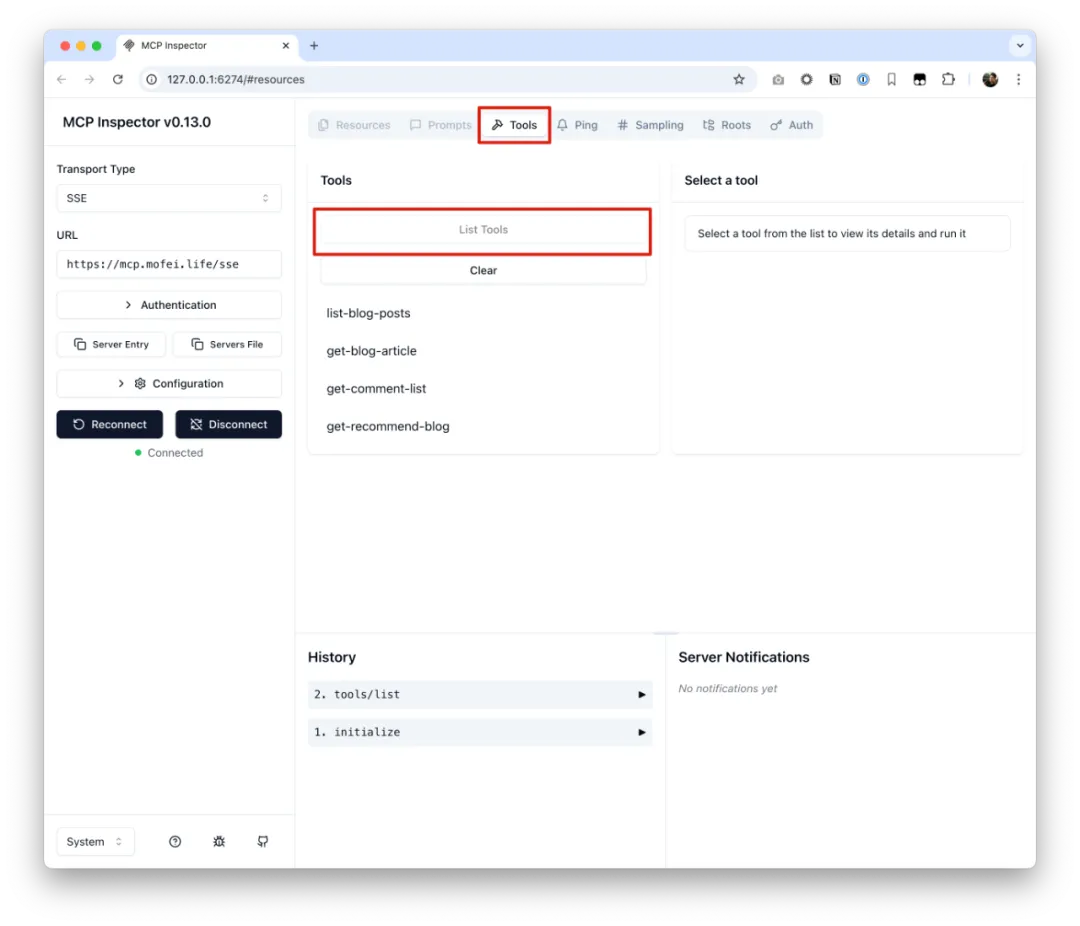
Once all tools are added, you can use the MCP Inspector to test and debug your setup.
First, run your local project from the root directory:
$ npm startThen, open a new terminal window and run:
$ npx @modelcontextprotocol/inspector@latestOnce that’s running, navigate to http://localhost:5173 in your browser. This will open the MCP Inspector interface.
In the inspector, enter the SSE endpoint of your local server—http://localhost:8787/sse—then click Tools → List Tools. You’ll see a list of all the tools you’ve defined.
If you expand the arrows in the History panel, you can view the raw tool definitions the LLM receives. For example, here’s what the tool descriptions look like for the four tools we created:
{
  "tools": [
    {
      "name": "list-blog-posts",
      "inputSchema": {
        "type": "object",
        "properties": {
          "page": {
            "type": "number",
            "description": "The page number to retrieve"
          },
          "lang": {
            "type": "string",
            "description": "Language code, e.g. 'en' or 'zh'"
          }
        },
        "required": [
          "page",
          "lang"
        ],
        "additionalProperties": false,
        "$schema": "http://json-schema.org/draft-07/schema#"
      }
    },
    {
      "name": "get-blog-article",
      "inputSchema": {
        "type": "object",
        "properties": {
          "id": {
            "type": "string",
            "description": "ID of the blog article, e.g. '665ad9f8136fb3b8b96dd685'"
          },
          "lang": {
            "type": "string",
            "enum": [
              "en",
              "zh"
            ],
            "default": "en",
            "description": "Language code: 'en' or 'zh'"
          }
        },
        "required": [
          "id"
        ],
        "additionalProperties": false,
        "$schema": "http://json-schema.org/draft-07/schema#"
      }
    },
    {
      "name": "get-comment-list",
      "inputSchema": {
        "type": "object",
        "properties": {
          "page": {
            "type": "string",
            "default": "1"
          },
          "pageSize": {
            "type": "string",
            "default": "20"
          }
        },
        "additionalProperties": false,
        "$schema": "http://json-schema.org/draft-07/schema#"
      }
    },
    {
      "name": "get-recommend-blog",
      "inputSchema": {
        "type": "object",
        "properties": {
          "id": {
            "type": "string",
            "description": "ID of the blog article, e.g. '665ad9f8136fb3b8b96dd685'"
          },
          "lang": {
            "type": "string",
            "enum": [
              "en",
              "zh"
            ],
            "default": "en",
            "description": "Language code: 'en' or 'zh'"
          }
        },
        "required": [
          "id"
        ],
        "additionalProperties": false,
        "$schema": "http://json-schema.org/draft-07/schema#"
      }
    }
  ]
}
You can also click on any specific tool in the list to run it interactively.
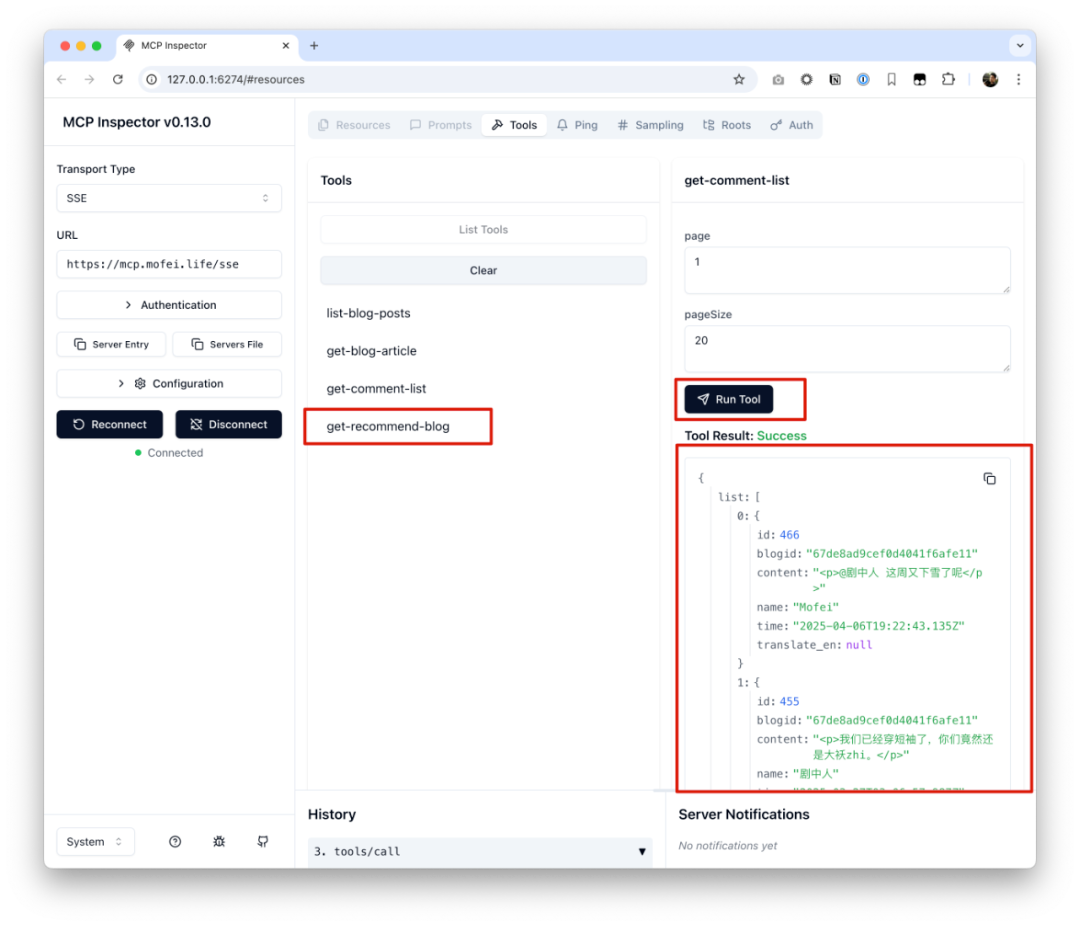
Feel free to test each tool individually based on your needs, making sure they respond correctly before going live.
Deployment
Once you’re done with local testing and debugging, you can deploy the project with the following command:
$ npx wrangler@latest deployThis command deploys your MCP server to Cloudflare. Once the deployment is complete, you’ll receive a public URL.
In my case, I configured the domain to be:
https://mcp.mofei.life/sse
You can now use this URL to connect your MCP Server to any LLM client.
Example Configuration in Claude
To connect Claude to your MCP Server, you can use the following configuration:
{
  "mcpServers": {
    "mofei": {
      "command": "npx",
      "args": [
        "mcp-remote",
        "https://mcp.mofei.life/sse"
      ]
    }
  }
}
Example Configuration in Cursor
For Cursor, the configuration is even simpler:
{
  "mcpServers": {
    "mofei-blog": {
      "url": "https://mcp.mofei.life/sse"
    }
  }
}
Validation
Let’s use Copilot as an example. After setting up the MCP configuration, we can try asking:
“What blog posts does Mofei have?”
As you can see, Copilot automatically calls the list-blog-posts tool and decides to pass page=1 and lang=en as parameters. If we ask the same question in Chinese, Copilot intelligently switches to using lang=zh:
From there, we can continue validating other endpoints by asking natural-language questions such as:
“What are the most recent comments?”
Conclusion
This hands-on project demonstrates that MCP Server is an incredibly lightweight, flexible, and extensible way to expose structured data sources to AI clients. Whether you’re running a blog, product catalog, comment system, or map service—if you have an API, you can easily wrap it with MCP and make it accessible to tools like ChatGPT, Claude, or Cursor.
Compared to traditional web search, MCP offers a more controlled and efficient data access path. It requires minimal changes to your existing services and has a very low deployment cost—making it especially suitable for small teams and independent developers looking to make their content AI-friendly.
I’ve already integrated my own blog with MCP and plan to continue exploring how it can be combined with tools like LangChain, Agents, and RAG to build more intelligent and privacy-aware knowledge systems.
📌 If you’re also interested in making your data understandable to AI, I highly recommend giving MCP a try. You can refer to the code featured in this article here:
Keep Reading
Writing about Finland, life, and code. The next post goes straight to your inbox, without the noise.
Got any insights on the content of this post? Let me know!